Platform Deployment
 Getting Started
Section titled “ Getting Started”This guide is designed for Nexus admins and engineers conducting Proof of Concepts (PoCs). By automating environment configuration, infrastructure provisioning, and service deployment, it streamlines the bootstrapping process—allowing you to stand up a fully functional platform instance in minutes through the following steps:
-
Prepare Environment Configure your local machine with the required CLI tools (gcloud, terraform, kubectl).
-
Execute Bootstrap Run the deployment script from your terminal:
bash ./iac/bootstrapping/bootstrap-platform.sh -
Verify Deployment Confirm the success of the installation in your local terminal and the GCP Console.
Prerequisites and Setup
Section titled “Prerequisites and Setup”Before running the bootstrapping script, ensure your repository and local environment are prepared.
Repository Setup
Section titled “Repository Setup”- Fork the Repository: Fork the official Nexus SDV repository into your own (private) GitHub account.
- Clone Locally: Clone your fork to the machine from which you will run the deployment.
Local Environment & Shell
Section titled “Local Environment & Shell”The bootstrapping script is developed and best tested for the Bash shell. While other shells might work, we recommend using Bash for the most stable experience.
Required Command Line Interfaces (CLIs)
Section titled “Required Command Line Interfaces (CLIs)”The following tools must be installed and available in your $PATH:
| Tool | Purpose |
|---|---|
| Google Cloud CLI | Authentication and GCP resource management. |
GitHub CLI (gh) | Managing repository variables and triggering Actions. |
| Terraform CLI | Provisioning the Cloud Infrastructure (IaC). |
| OpenSSL | Generation of secure tokens and secrets. |
| Nk | Creating NKeys for NATS communication authentication. |
Launching the Script
Section titled “Launching the Script”Execute the bootstrap-platform.sh script from the project’s root directory to initially set up the platform:
$ bash iac/bootstrapping/bootstrap-platform.shThe script will check whether all necessary prerequisites have already been installed. If not, the script will output a list with all missing tools to be installed and break.
Querying User Inputs
Section titled “Querying User Inputs”After authentication, the script will prompt you for the following configuration data to set up your environment:
- Google Cloud Project ID (
GCP_PROJECT_ID): The ID of the GCP project where the platform will be deployed. - Google Cloud Region (
GCP_REGION): The target region for your infrastructure (e.g.,europe-west3). - GitHub Repository Notation (
GITHUB_REPO): Your forked repository in the formatowner/repo. - GitHub Environment (
ENV): The name of the environment to be created or reused within your GitHub project. - Setup Strategy (
PKI_STRATEGY):localorremote, see below.
Setup Strategies: Local vs. Remote
Section titled “Setup Strategies: Local vs. Remote”For your first deployment, we recommend starting with the Local strategy.
The Local strategy is the fastest way to get started. It uses IP addresses instead of DNS names and relies on self-signed certificates.
- Pros: Rapid setup, no DNS or CA configuration required.
- Cons: Limited to IP-based communication; no custom domain support.
The Remote strategy is designed for production-like environments. It leverages Google Cloud DNS and the GCP Certificate Authority Service (CAS) to establish a managed, scalable Chain of Trust.
Prerequisites:
- A registered DNS Domain and an active Cloud DNS Zone within your Google Cloud project.
Interactive Setup: The deployment script will guide you through an interactive dialog to capture your configuration. Key parameters include:
PKI_STRATEGY="remote"BASE_DOMAIN="nexus.your-oem-domain.com"EXISTING_DNS_ZONE="nexus-your-oem-domain-com"Beyond these, the script will prompt for additional environment-specific details, such as endpoint hostnames, CA and CA-pool identifiers. All inputs are persisted in your .bootstrap_env for future reference.
⚠️ Critical: Backup your
.bootstrap_envThe values captured in this file are essential for a successful teardown. Without it, the script cannot cleanly decommission managed resources like CA Pools and DNS records. Always keep a secure backup.
Automated Infrastructure Output: Nexus handles the complexity of production setups automatically. The script:
-
Provisions Managed CAs: Creates GCP CA Pools and Sub-CAs based on your inputs.
-
Writes Metadata: Automatically exports all generated identifiers back into the
.bootstrap_env. -
DNS Orchestration: Sets up the necessary A-records and managed zones.
-
Pros: Full mTLS with managed CAs, professional DNS endpoints, production-grade security.
Automated Launch with an Env-file
Section titled “Automated Launch with an Env-file”To skip the interactive dialogues and provide the required inputs automatically, you can create a configuration file named .bootstrap_env.
Placement: Save this file in the iac/bootstrapping/ directory. The script will automatically detect these variables and bypass the manual prompts.
Example .bootstrap_env for Local Setup:
GCP_PROJECT_ID="sdv-sandbox"GCP_REGION="europe-west3"GITHUB_REPO="your-user/valtech-sdv-sandbox"ENV="sandbox"PKI_STRATEGY="local"Automated Provisioning & Deployment
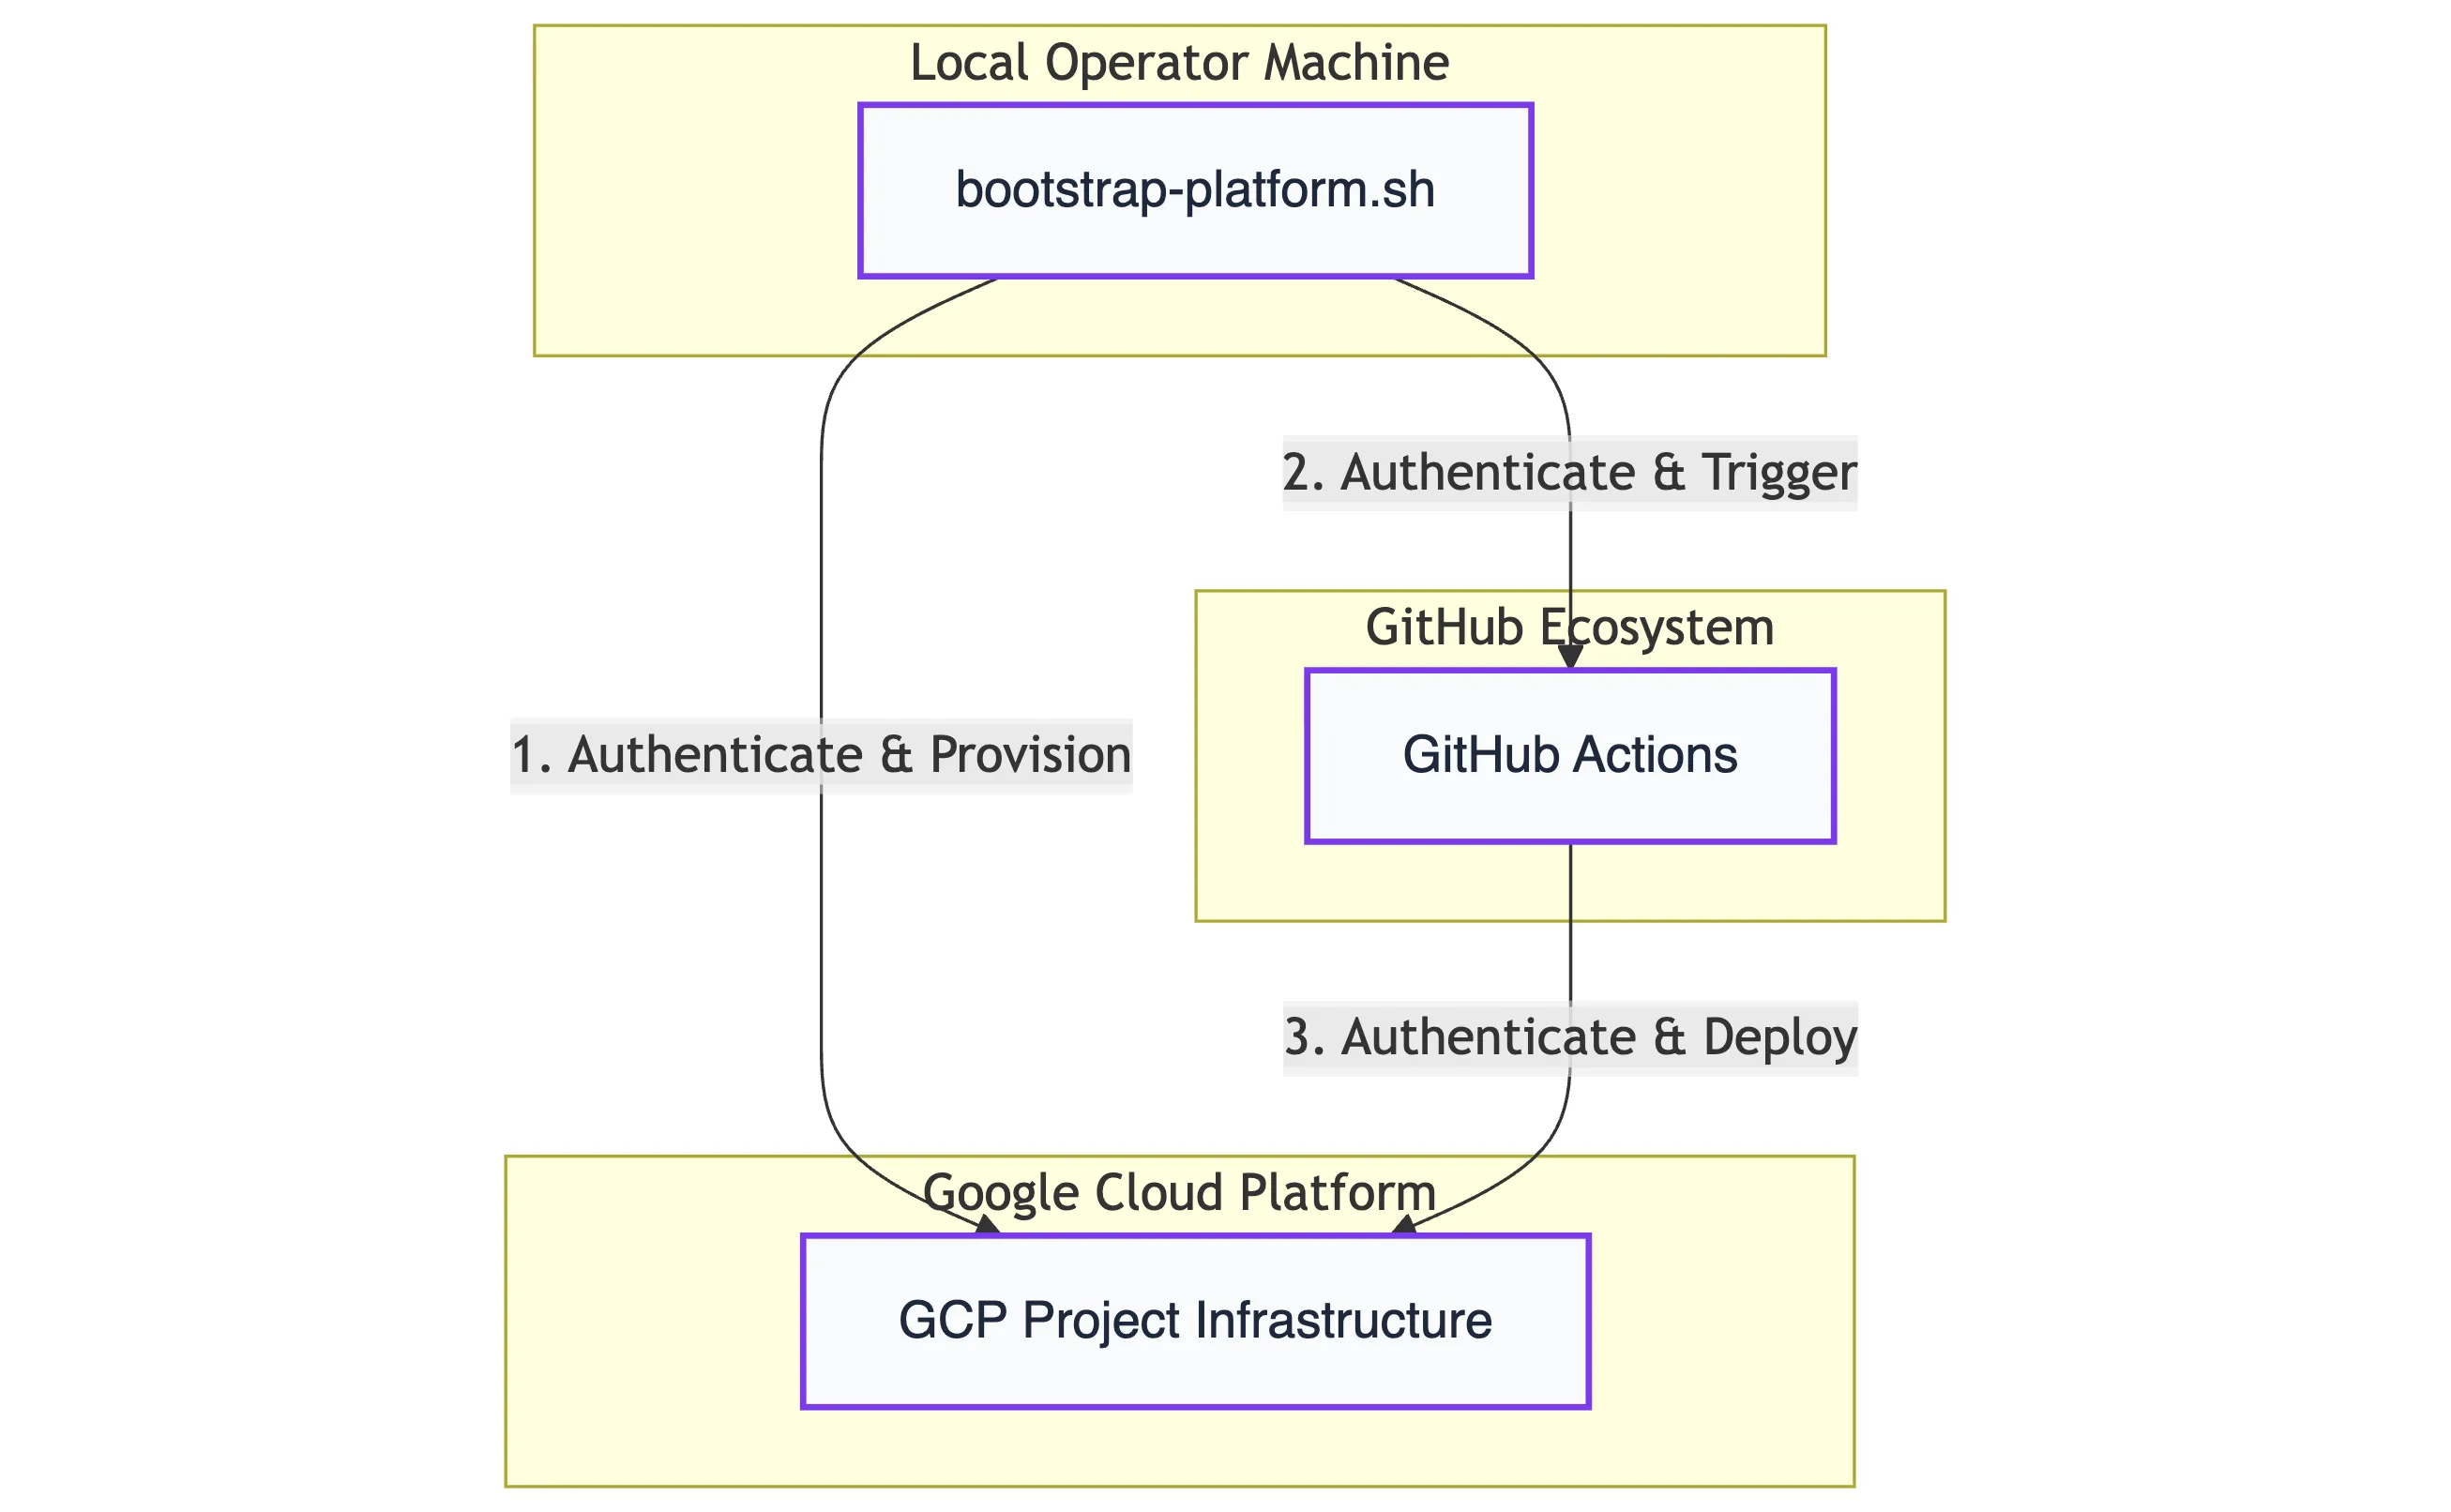
Section titled “Automated Provisioning & Deployment”Now that the configuration is set, you can relax and monitor the progress in your console. The bootstrapping script will handle the heavy lifting across your GCP project and GitHub repository in a coordinated sequence:
What is happening in the background?
Section titled “What is happening in the background?”The deployment follows a three-stage execution flow:
-
Infrastructure Provisioning (Terraform): Essential Google Cloud resources are set up using Terraform. This includes the API activation, the Terraform state bucket, and the core infrastructure components.
-
Configuration & Security Mapping: In between the main steps, the script creates GitHub environment variables within your specified repository and stores secrets within the Google Cloud Secret Manager. This stage is essential for establishing the automatic deployment flow and managing platform keys for mutual TLS (mTLS) and CA registration.
-
Software Deployment (GitHub Actions): Once the foundation is secure, the platform’s base services are deployed via GitHub Actions pipelines. These components are automatically distributed to their target runtimes on Google Cloud Run and Google Kubernetes Engine (GKE).
Verifying Deployment Success
Section titled “Verifying Deployment Success”Once the bootstrapping script completes its execution, you should see a confirmation in your terminal accompanied by several green success indicators.
Terminal and GitHub Confirmation
Section titled “Terminal and GitHub Confirmation”A successful deployment is characterized by the following outputs:
- Terminal: The script will print
Nexus SDV platform bootstrapping successfully completed!along with celebratory emojis.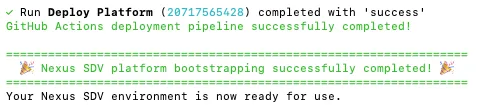
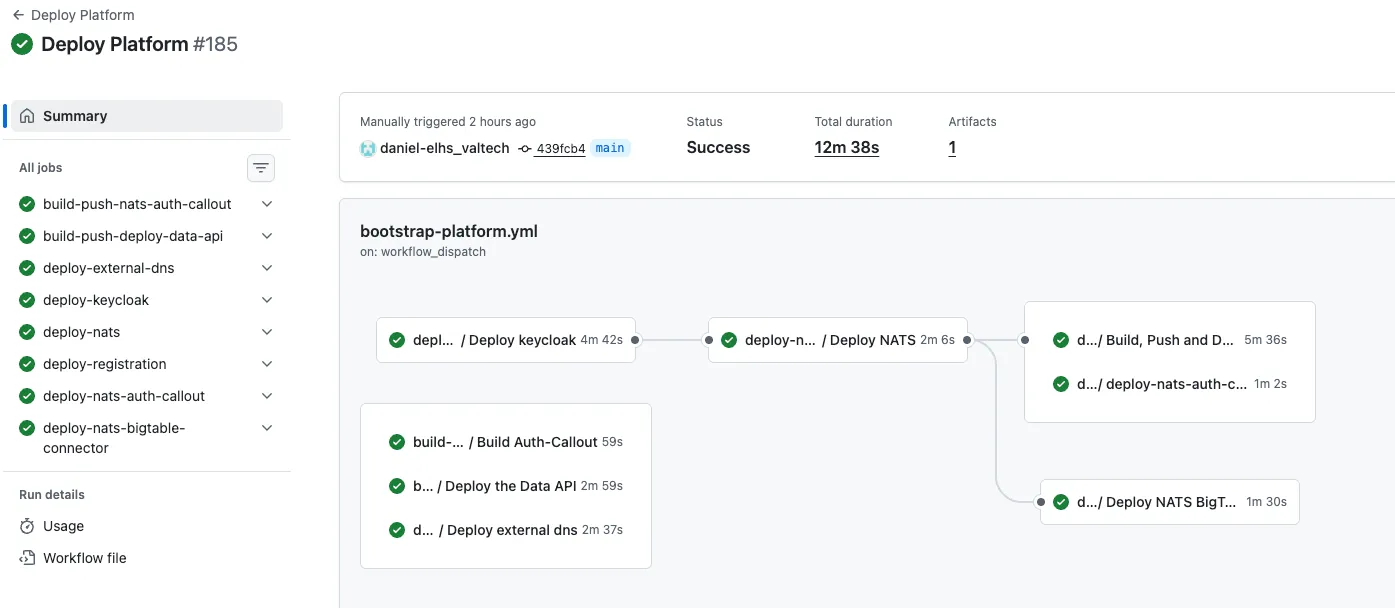
- GitHub Actions: In your forked repository, the “Deploy Platform” workflow should show a green “Success” status. You can verify the individual jobs (e.g., Keycloak deployment, NATS setup) in the GitHub Actions tab.
Manual ‘Smoke Check’ in GCP
Section titled “Manual ‘Smoke Check’ in GCP”To ensure all infrastructure components are correctly provisioned, log in to your Google Cloud Console and verify the following:
| Service | Expected Resource |
|---|---|
| Cloud Storage | A bucket named [gcp-project-name]-tfstate containing the default.tfstate file. |
| Kubernetes Engine | A GKE cluster named [env]-gke with healthy, running pods. This hosts the Nexus base services (Status: Green). |
| BigTable | An active BigTable instance named bigtable-production-storage ready for data ingestion. |
Platform Output & Connectivity
Section titled “Platform Output & Connectivity”In a Local Setup, the platform relies on IP addresses.
- IP Addresses: Check the script output for the assigned external IP addresses of your GKE services.
- Sample Client: You can find initial connectivity tests in the
sample-clientfolder.